What's
New:
04/07/2020: Version 10 is now included
in the official Campaign Waterloo 1.08 update. See John Tiller
Software, Updates.
04/07/2020: Some revisions to 2.3
Order of Battle and 2.5
Graphics (Optional).
16/05/2020: Version 10.
Minor
redeployment of the 27e Jagers in scenario 3.2
[HB_Quatre_Bras_3.2_Manoeuvre.scn] to avoid the French Garde Lanciers
in hex 39,85 to become unfixed. A list
of previous updates is included in the zipfile.
25/01/2020: Replaced Appendix B by a
revised and expanded translation published on The
Napoleon Series.
|
1.
Introduction
The
expansion pack contains scenarios (.scn), parameter data (.pdt), order
of battle (.oob) and submap (.map) files for the computer wargame Campaign Waterloo.
At present it
includes nine scenarios covering the engagements at Frasnes and Les
Quatre
Bras on the 15th and 16th of June 1815 and one scenario
covering
part of the Battle of Waterloo on the 18th of June 1815. The
.pdt
and .oob
files modify gameplay, but only for these scenarios. This website
basically
forms the package leaflet, explaining what has been done and
why, as
well as providing some background information.
Campaign
Waterloo
is a turn-based computer wargame by HPS Simulations
and John
Tiller
Software. I do not represent these companies. I am not
responsible for the
unlikely event that the use of files downloaded from this
website causes damage to computers or
software.
Your comments or questions are welcome.
Hans Boersma
October 2018
2.
Download
To
download, click
here.
Extract the zipfile to your Campaign Waterloo folder. This
folder might be located at C:\John
Tiller Software\ or C:\Program Files (x86)\HPS Simulations\. If your
game is installed in a
different location, unzip the file to the Campaign Waterloo folder
there. No original
game files will be overwritten.
It may be a good idea to make sure you have updated your game to the
latest version. The files contained in the
zip file are described in detail below.
2.1
Scenarios
The scenarios come in
three sorts: Historical, Variant and Manoeuvre. In the historical
scenarios I have done my
best
to schedule and deploy the units of both sides as historically accurate
as possible, taking
into account the
abstractions and inaccuracies
of
the game map and the
effects of a turn-based game sequence. The two other categories depart
from the historical situation: Variant scenario's explore "what-if"
possibilities, whilst Manoeuvre scenario's offer players more
freedom to
deviate from history by starting before the actual battle. The latter
may still include fixed units to represent physical limitations rather
than tactical decisions: for example on 16 June the Brunswick corps
halted several hours at Genappe in order to rest after it
had been marching since dawn.
• 1.0 Skirmish at
Frasnes, 15 June 1815 (Historical), 13 turns
[HB_Quatre_Bras_1.0_Historical.scn]
In
the early morning of 15 June 1815 Napoleon's Northern Army crossed the
border of the newly created Kingdom of the Netherlands, pushing the
forces of the Prussian I Corps out of Charleroi and Gosselies. The
Prussians retreated eastwards and Marshall Ney, poised to drive a wedge
between the Prussian Army (Blücher) on his right and the Anglo-Allied
Army (Wellington) on his left, has ordered General Lefebvre-Desnouettes
to advance his Guards Light Cavalry Division northwards to the village
of Frasnes and reconnoitre the area. They reached the village early in
the evening and ran into the outposts of Wellington's 2nd Netherlands
Division: one battalion of Nassau light infantry and one battery of
Dutch horse artillery. These performed a skillful fighting withdrawal
towards the crossroads called Les Quatre Bras, the assembly point for
their brigade in case of alarm.
• 1.1 Skirmish at Frasnes,
15 June 1815 (French Variant), 13 turns
[HB_Quatre_Bras_1.1_French_Variant.scn]
Although
their primary mission was reconnaissance, Lefebvre-Desnouettes's
cavalry division would have done well to bring up their artillery. For
some reason this did not happen. With two batteries of horse artillery
their brush with the Netherlands outpost might have turned out quite
differently. Also, there is no indication that Lefebvre-Desnouettes
used his Chasseurs à Cheval. With these restrictions removed the French
side might be able to take the crossroads on the evening of the 15th.
• 2.0 From Frasnes
Onwards, 15 to 16 June 1815 (Manoeuvre), 91 turns
[HB_Quatre_Bras_2.0_Manoeuvre.scn]
This
scenario starts out as 1.0 Skirmish at Frasnes,
but
continues until nightfall on 16 June when, historically, the Battle of
Quatre Bras had come to an end. All reinforcements arrive at their
historical times and places, but after the historical set-up in the
first moves both sides are free to deploy their forces as they see fit.
Because night turns last one hour the historical nighttime
reinforcement sequence for the Allied side is somewhat
compressed.
• 3.0 The Battle
of Quatre Bras, 16 June 1815 (Historical), 30 turns
[HB_Quatre_Bras_3.0_Historical.scn]
Napoleon
has ordered Ney to advance towards Brussels as far as Genappe. The fact
that Ney finds De Perponcher's 2nd Netherlands Division in a blocking
position is thanks only to the initiative of the Netherlands commanders
taken in the previous night. The Prince of Orange, who arrived on the
field at about 6.30 AM, has ordered Van Merlen's 2nd Netherlands Light
Cavalry Brigade to Quatre Bras. The Duke of Wellington, who arrived at
about 10 AM, has ordered his Army Reserve to advance to Genappe from
the
direction of Brussels. He inspected De Perponcher's positions until
about 11.00 AM and is now on his way back from a meeting with Blücher
at Brye. In the meantime Ney, after Foy's Division arrived on the field
and moved into position, has ordered the attack. The Prince of Orange
responds by calling up more reinforcements from Genappe and Nivelles,
whilst trying to keep at least one foot on the
doorstep of
the crossroads.
Note: What is wrong with the
original, out-of-the-box historical Quatre Bras scenario
[022.Quatre_Bras_h.scn]? Well, apart from
some issues
regarding unit placement, it has the following rather serious flaws:
- The Brunswick
corps
arrives before instead
of after
Picton's division (This can probably be explained by the fact that The
Brunswick corps arrived at Genappe around noon, before
Picton's
division. It rested there before proceeding to Quatre
Bras in the wake of Picton's division.)
- From Picton's division, Best's Hanoverian brigade is
missing; also
missing is the divisional artillery (Rogers's and Rettberg's batteries)
- Van Merlen's cavalry
brigade arrives with six guns too many (should be
two guns)
- Von Alten's division
arrives on the map from the direction of Brussels (north),
which should be from Nivelles (west). Moreover it includes Von Ompteda's brigade,
which
was not present
- Cooke's
division also arrives from
the direction of Brussels instead of Nivelles
- D'Erlon's Corps does not
arrive at all, even though the scenario runs
to 11 PM
- This also goes for
Anglo-Allied reinforcements which arrived when the
battle was coming to an end, such as Von Kruse's Nassau Brigade and
Ponsonby's cavalry brigade
The cumulative effect of these
shortcomings is that the original scenario fails to provide a
reasonably accurate depiction of the historical battle.
Another note: It is uncertain whether Lefebvre-Desnouettes's
horse
artillery (two batteries) and
Reille's corps reserve artillery (one battery) actually made it to the
battlefield. Regarding the former there are
indications that it didn't. As a compromise I included only the
latter and scheduled it after Guiton's cavalry brigade.
• 3.1 The Battle
of Quatre Bras, 16 June 1815 (French Variant 1), 30 turns
[HB_Quatre_Bras_3.1_French_Variant_1.scn]
The
Battle of Quatre Bras was a meeting engagement in which both
sides struggled to get the necessary forces on the battlefield. But why
didn't Ney take the crossroads when he could? From 2 PM to 3 PM, facing
only De Perponcher's division, he had a clear advantage both in numbers
and in troop quality. Aside from a certain hesitancy on his part it is
worth noting that Napoleon had restricted Ney's command right where his
greatest advantage lay: his cavalry. Ney was not allowed to use the
Guards light cavalry of Lefebvre-Desnouettes, whilst Guiton's brigade
of cuirassiers only became available to him when Napoleon was satisfied
that he didn't need it at Ligny. In this version of the battle the
French side suffers no such restrictions.
• 3.2 The Battle of Quatre Bras,
16 June 1815 (Manoeuvre), 34 turns
[HB_Quatre_Bras_3.2_Manoeuvre.scn]
The French main attack developed at ± 2 PM. Its first stage was
directed at De Perponcher's left wing (Lairalle-Piraumont
area), as reflected in the set-up of the
historical Quatre Bras scenario (3.0). This version
begins before the actual battle started
to
allow the French side to choose a different approach. It will become
apparent that Ney's forces
more or
less marched straight off the road and
into battle, just as the Allied reinforcements would later in the
afternoon.
• 3.3 The Battle of Quatre Bras,
16 June 1815 (Allied Variant), 34 turns
[HB_Quatre_Bras_3.3_Allied_Variant.scn]
The Netherlands commanders attached great importance to the Bois de
Bossu: they knew it would be difficult and time-consuming for the
French to clear the wood, and whilst in possession of it Anglo-Allied
forces would be able to at least threaten the free use of the
crossroads. In addition the wood masked the arrival of Allied
reinforcements from the direction Nivelles, where the bulk of the
Prince or Orange's I Corps was. In the real event the Allied
centre and left wing soon came under great pressure and nearly broke.
How important was the Bois de Bossu? In this scenario De Perponcher has
taken a more concentrated position and he has deployed his strongest
brigade, that of Von Saxen-Weimar, on his left. Van Bijlandt's brigade
defends the centre, the Bois de Bossu is left largely undefended in the
expectation of reinforcements from the west. Like
the previous scenario this version also starts earlier than the
historical battle.
• 3.4 The Battle
of Quatre Bras, 16 June 1815 (French Variant 2), 30 turns
[HB_Quatre_Bras_3.4_French_Variant_2.scn]
The
Dutch researcher Pierre de Wit argues, we believe
convincingly, that it
was not Napoleon who ordered D'Erlon's corps to Ligny, but
rather that D'Erlon marched in that direction on his own initiative. He
would have taken this action after being informed about the
order
Ney received around 3.30
PM, in which Napoleon told Ney to wheel right at
Quatre Bras
and attack the
Prussian right wing at Ligny ("The fate of France is in your hands").
Finding that Ney had his hands full with Wellington, D'Erlon would thus
have
decided to act in the spirit of Napoleon's intentions.
The wargaming evergreen of D'Erlon joining the Battle of Quatre Bras
does not become more likely in this light, but it is offered
here for
your entertainment nonetheless.
• 3.5 The Battle
of Quatre Bras, 16 June 1815 (Variant), 30 turns
[HB_Quatre_Bras_3.5_Variant.scn]
Continuing
on the path of limited likeliness, in this variant not only
D'Erlons corps
joins the battle, the Allies call up more reinforcements as
well.
What they need most is cavalry, so the remainder of De Collaert's
Netherlands Cavalry Division, which is closest by at
Arquennes, is
ordered to march to the crossroads as soon as the French attack
develops in earnest. Chassé follows in the wake of Von Alten's
division,
leaving Nivelles undefended.
• 4.0 Waterloo: The Ohain Road,
18 June 1815 (Historical), 15 turns
[HB_Waterloo_1.0_Historical.scn]
In
the morning of Sunday 18 June it became clear to Napoleon that
Wellington, after his retreat and rearguard actions of the
previous day, would make a stand at Mont Saint-Jean. Though it
meant accepting battle on terrain chosen by his opponent, Napoleon
decided against outmanoeuvring Wellington and in favour of a
massive frontal attack on the centre of the Allied position. The
primary force for this attack would be D'Erlon's corps which,
after a preliminary bombardment by a "grand battery", would
advance on the Allied left in massive columns, smash a big hole in
their lines and occupy Mont Saint-Jean village. D'Erlon would be
supported by a large cavalry force, whilst Lobau's corps would
follow up to secure and exploit D'Erlons gains. The Imperial Guard,
finally, would secure victory.
Note: this scenario is
basically a corrected version of the original "The
Ridge" [032.The_Ridge_v1.scn] scenario, with Van Bijlandt's
brigade, the Grand Battery and Lobau's corps deployed in their proper
positions. To enable the Grand Battery to fire at the Allied line from
its historical position the fields had to be cut
down. Visibility
has instead been limited, and made variable, by the weather lines in
the parameter data file, also to simulate the obscuring effect of dense
clouds of gunpowder smoke. Movement is limited to simulate the soggy
state of the ground. The deployment of Van
Bijlandt's, Kempt's and Pack's brigades is based on the minute
reconstruction by Pierre de Wit which translates
quite well to the 100-meter hex map. Van
Bijlandt's brigade was ± 30 meters in front of Kempt's and Pack's
brigades, so the one-hex interval applied here is a judgement call,
based on what makes more sense in game terms:

Without the interval it
would look like this:

Especially
when compared to the original "The Ridge" scenario set-up (see below),
which puts Van Bijlandt on the foreward slope as if our historical
understanding ended with Siborne, the corrected unit placement
makes much more sense both in historical and game terms: it
actually looks like a Wellingtonian deployment.

2.2 Parameter Data
[HB_Quatre_Bras.pdt]
Compared to the original parameter data file
[waterloo_campaign_new.pdt] the following changes have been made:
•
The clock has been adjusted to local time. Dawn now starts
at 2.45 AM
(was 2.30 AM), dusk starts at 8.15 PM (was 9.30 PM), twilight
lasts one hour
(was two hours). Source: De
Koepel Observatory,
Utrecht. Because night turns last 1 hour dawn may start too late,
depending on what time the scenario starts. However, dusk was a more
important factor in
this campaign than dawn: the French weren't exactly early risers in
June 1815.
•
The fatigue recovery values have been lowered from 15/75 (day/night)
to 0/75, in order to better reflect
what the game's user manual says on the subject:
"Fatigue is used to
represent combat fatigue, not the physical state of being 'winded'.
The physical effects of combat fatigue are felt long term and do not
wear off through simple rest. In many Napoleonic War battles, the end
of the battle was determined by fatigue and not by losses. In larger
battles, commanders
had to be careful to rotate their fighting units and not commit any one
force too long to battle. Having higher Fatigue recovery rates would
permit the unrealistic ability for commanders to rest units for short
periods of time and then recommit them to battle, something that was
not common historically."
The
original values are still much too lenient, however. When I
playtested the large Manoeuvre scenario (2.0) I found that by turn 82
there was only one single unit with High Fatigue on the map, even
though overall losses had mounted to some 8,500 men. Most units had Low
Fatigue or none at all. I played against the A/I in its most aggressive
mode which meant that the French just kept on coming. In one
particular situation two Allied batteries fired at three French
battalions in column, stacked in one hex, at a distance of one
hex. In two or three turns the artillery had blown away more than half
of the French infantry's strength (32, 54, 55% left) but the
latter's fatigue
remained remarkably low (342, 255, 521 on a scale of 900).
What would clearly be
in order is an increased fatigue accumulation, but this is not
possible through the pdt file. It would be possible to lower
the maximum fatigue level from 900 to, say, 600, but then
there would be nothing between Medium Fatigue and Maximum
Fatigue. So the only way to address this is by reducing
fatigue recovery. It should be noted that
the recovery values are
not percentages, despite what the game's F2 menu says.
According to the
manual a unit that has rested for one turn will shed a number of
fatigue points, which number is a random value between 0
and twice the recovery value. Nonetheless, tests have
shown that a daytime recovery value of zero, as applied here,
will still recover some 20 fatigue points
per unit in 8 hours of daytime rest (32 turns). For campaign scenarios
this lowest recovery rate will be too restrictive, but here it helps to
serve
our purpose. The nighttime recovery value of 75 means that a full night
of rest (6 hours/turns) is on average worth
some 350 recovery points. A unit with High Fatigue
(600-900) cannot hope to
sleep it
off in one night, and when a unit enters Medium Fatigue (300-599) you
will need to consider its role in the remainder of the battle.
•
The chance of an infantry unit becoming low or out of ammo has
been changed from 4% per turn for all sides to: French
6%, Prussian 7%, Anglo-Allied 8%. The original values
provide an
unreal overabundance of ammunition which allows us
mouse-clicking generals to merrily
fire
away
without ever having to worry about supply. Historically
it was common for a
battalion to run out of ammunition after half an hour of
sustained firing: two turns in game terms. Applying
this would likely dampen our
virtual thirst for battle, but the values mentioned above do at least
make
fire and ammunition management a more prominent part of the
game.
Especially for the Anglo-Allied side, as playtesting has shown
that at 8% the positioning of ammunition wagons actually
becomes
an issue. In addition there are now less
supply wagons in the scenarios: one per division, as a rule. Comparing
scenario 3.0 to the original historical Quatre Bras
scenario
[022.Quatre_Bras_h.scn] the Anglo-Allies have 5 instead of 8
wagons, the French have 6 (but
really 4) instead of 9 wagons. The differentiation between the three
sides aims
to address the fact that the game engine does not differentiate ammo
loss
by formation,
whilst it does differentiate firepower by formation. The French side is
on the attack and will be predominantly using column
formations, using less ammunition. The Prussian side fights
both offensive and defensive, using both column and line formations. The Anglo-Allied side,
being on the defensive, will be fighting in line a lot of the time,
spending more ammunition. British infantry actually applied their
firepower extremely selectively (and effectively), but the British
formed only about 1/3 of the Anglo-Allied Army. Their Netherlands,
Netherlands-Nassau, Brunswick and Hanoverian allies were more
susceptible to a continental tendency to
become engaged in prolongued but ineffective firefights. These values
were modified from
Jason Cawley's work.
•
The infantry extended line feature has been disabled by setting the
required strength values high enough to ensure that no battalion of any
side
can go into extended line. This measure, taken in conjunction with the
splitting of large battalions, is further discussed under 2.3 Order of Battle.
•
The stacking limit per hex for infantry has been lowered from 2000 men
to 1400 men for infantry, and from 1000 to 700 for cavalry, in order to
achieve more a historical deployment of forces. One can put 2000 men
into a 100 x 100 meter field without too much trouble, but Napoleonic
formations require more space to manoeuvre and change formation. The
infantry limit of 1400 men ensures that the Prussians can still stack
two infantry columns in one hex, though they may need to deploy their
skirmishers to make room.
• The cavalry
divisor (for skirmishing mode) has been
changed from
1/4 to 1/3 in order to reduce the number of very small cavalry
units;
after all, these units have zones-of-control (ZOC). Adopted
from
Rubén López.
• The number of
maximum cavalry units in one hex has been reduced from 8
to 4
to discourage stacking lots of cavalry "skirmisher" units in one hex. Adopted from Rubén López.
• The fanaticism
morale bonus has been lowered from 2 to 1. It is presently only
used for the Dutch 5th Militia Battalion (Quality C) at Quatre Bras;
this
unit proved steadfast at Gemioncourt because of good
leadership
rather than because of military capabilities. The
battalion repelled four subsequent charges by Piré's cavalry,
but was broken after most of the officers were killed.
•
The game map wrongly depicts the hamlet of Pireaumont as a fortified
position stronger than Hougoumont. The terrain combat modifier of Walls
have therefore been reduced from -20% to -5%. This should really be
zero, but since the walls are there on the game map they should at
least have some effect. See also Appendix
A.
For Waterloo the following additional changes have been made:
• To enable the French
"Grand Battery" to
fire at the Allied line from its historical position the fields have
been cut down to a height of zero meters.
• To compensate,
and also to simulate the obscuring effect of gunpowder
smoke created by the Grand Battery and by massed musketry in general,
visibility
has been limited and made variable.
• Movement is
limited to simulate the soggy state of the ground.
• The abatis on the
Brussels Road near La Haye Sainte has been added, but
as it wasn't very effective its fire vulnerability modifier
has been reduced from 45 to 10.
• To
better simulate the Sand Pit, which measured between 30 x 15 and 50 x
50 meters and was between 3.6 and 4.5 meters deep, the
defensive
modifier of Rough terrain has been increased from 10 to 15
and its movement penalties have been
increased. Especially cavalry, artillery and supply wagons now best
stay clear of that hex. For the specifics, hit F2
in the game.
2.3
Order of Battle
[HB_Quatre_Bras.oob]
•
Battalions
with a strength of 700 men or more have been split in two. This has
been done primarily to achieve a
more
realistic frontage, and thus firepower and melee strength per
hex, for
infantry
in line. To
put the problem simply: many of the infantry battalions would not fit
in a ± 100 square meter hex when in line formation; but in the
game they do. Thus their combat power
per hex is too large. Splitting large
battalions also decreases the number of oversized skirmisher units.
After
all, with 150
men
in a ± 100 meter hex there is not much room to skirmish.
Another reason is fatigue: because fatigue is
accumulated by
absolute numbers rather than by percentage, large units suffer more
from it. This seemingly drastic measure only affects the
Anglo-Allied
Army,
since there are as yet no scenario's involving Prussian
formations. And the French battalions are perfect to scale.
You might want to make some coffee, for I will now elaborate
on
unit
frontage.
First
of all we need
to accept that this game much more resembles a
game of chess than it resembles a close simulation of reality;
there is a large amount of abstraction at work. Nonetheless a certain
amount of scale and proportion needs to be
maintained so that in the end the overall result is more or less
realistic. More or less realistic in terms of time and space
and, if possible, in terms of firepower and casualties.
The real frontage per hex (± 100 meters) of infantry in line
would
be no more than ± 160 men (at ± 0.6 meter per man). Which
is quite
different
from
the
300 men that one of Von Saxen-Weimar's large Nassau battalions (900
men) squeeze into 100 meters of frontage according to the original
game settings. That is, if we pretend that they fight in a
3-rank
line like the original values do; in reality they fought in a 2-rank
line, which
means 450 men per 100 meters, or a rather cramped 22 centimeter per
man. But let's leave that aside for the moment. If we assume that
all infantry are 3-rank, we
arrive at a battalion size of (3 x 160 =) 480 men being able to form
line in one hex. Taking into consideration the peculiarities of a map
turned into a chess board, we add about half of that strength as an
abstraction margin: 480 + (220) = 700. In reality all
Anglo-Allied
infantry fought in 2-rank line (probably with the
exception of Von Kruse's Nassauers),
but applying a splitting point of 480 men (160 x 2 + (160/2) = 480)
would simply add too much
units to the game, never mind being well on our way towards a company
level game with 240-men half-battalions. So as another
abstraction we accept that in
terms of size all infantry is 3-rank infantry. To achieve a wider, more
historical frontage players
might want to leave one hex open between
two (half-)battalions, covering four rather than three hexes
with musketry and ZOC.
The
original game deals with large line formations through the extended
line feature. Regrettably the game's handling of this feature is rather
unbalanced: going into extended line from column takes two turns (half
an hour), which is extremely long especially when we consider that
going into extended line in
fact merely represents going into line. Going out of extended line
on the other hand, and
forming square
or column, takes only one turn (15 minutes). We might
perhaps still
want to
accept this, and if we changed the extended line values from 600 men
(2-rank) and 800 men (3-rank) to something like 480 men
(2-rank) and 700 men (3-rank),
we would at least have dealt with the size issue. But there is yet
another
problem, one that would then become more prominent: the "shortened
line" formation. This formation would then become the standard line
formation
for many units. A battalion in "shortened line" formation has enough men to go into
extended line formation, but
doesn't. A rather eccentric formation that can only be
explained
as the 4-rank line
that only the British used, and then only on very few
occasions;
but including at Waterloo. It would however be peculiar to maintain the
extended line feature for the British so that they can not use it. For
these reasons I
decided to disable the extended line feature
altogether and deal with the size problem through splitting
battalions alone.
Splitting
has the
merit of a simple and uniform solution that affects a limited number of
units. The
700-men splitting point ensures that
the resulting half-battalions, identified in the unit
box as "[a]" and "[b]", still have enough strength to qualify as
battalion-sized units. At the same time a player may want to think
twice before
deploying a skirmisher unit from a 350-men half-battalion,
and turn to a proper light infantry battalion instead. Large light
infantry battalions are now better
represented with two formed
units in reserve, which enables them to cover a wider
frontage whilst, if used prudently,
deploying a smaller percentage of their strength as skirmisher
units.
In the end it is merely about accepting the consequences of the game's
abstractions. The game map is subdivided into fields,
and it
is only
logical that the game pieces should fit in the fields, otherwise
there is no single scale, no proportion. So, is this
an ideal solution then? Not really, but
perhaps it is the best that can be done. A non-optional,
properly functioning extended line feature for large
battalions would still confront a French player with some amazing
lateral movements: one moment you are directing your cavalry at a nice,
juicy battalion in line, the next moment it is 100 meters to your left
or right, in square. On the other hand, splitting produces fully
independent half-battalions that can each form square and may operate
at great distance from each other. For what it is worth, the
Netherlanders and Nassauers at Quatre Bras did indeed detach companies
and groups of companies hither & thither, not
necessarily in
skirmishing order.
But if so desired, a simple self-imposed rule would address this, for
example by allowing no more than one hex between sibling units,
or none.
Regarding
the ability to form square, the anti-cavalry formation that such a
half-battalion would apply should not be seen as a standard hollow
square but as a closed square formed from a closed order
column,
or a smaller square of a more improvised nature.
There are collateral
consequences. A
split battalion comprises two firing units, but also two
targets:
both firepower and vulnerability are divided in two. Disorder
suffered by [a] is not suffered by [b]. Command
problems increase because there are more units (see further below).
Half-battalions are weaker in melee, especially if used in line. For
melee purposes there is now a bigger incentive to use columns
and
to stack units. Now the choice between applying fire power
as effectively
as possible (line) and concentrating strength for solidity and
thrust (column) has become more significant. This, I think,
is appropriate.
For in the out-of-the-box situation many allied battalions in line
formation do not only have too much firepower, they are also too strong
in melee.
With
the extended line feature switched off the only remaining difference
between 2-rank and 3-rank infantry is firepower. This is in
fact welcome. As we have seen, all or nearly all Anglo-Allied
Infantry fought in 2-rank line, not just the
British and KGL as the original values suggest. But only the British
and KGL
infantry deserve the 150% fire effectiveness attached to
the
2-rank line formation, and they therefore remain classed as such.
The 2-rank formation
now merely serves as vehicle to simulate the effectiveness of British
fire tactics (selective, well-timed, well-levelled volleys at short
range, usually followed by a bayonet charge). It would seem logical to
use the British Musket and British Rifle weapons for this (see below),
but only the 150% effectiveness produces a reasonable 1,5 fire
points at 2-hex
range.
• Given
the fact that British and KGL infantry already fire at
150% effectiveness, the game's introduction of an extra powerful
British
Musket, firing at 200% effectiveness at 2 hexes and 140 %
effectiveness at one hex, is definitively an overstatement of British
fire tactics. They have
been given back their normal muskets.
• The
same applies to the British Rifle which, with the double fire bonus,
fires like a modern assault rifle. Normal rifles have been handed out
once again.
•
Colonel von Saxen-Weimar, now
having almost twice the number of formed units in his brigade, has been
handed
something of a command problem. This is, however, not unhistorical. An
extra deputy commander (Colonel von
Dressler) has been added as a patch, which should at least help to
rally routed units and add a bit of morale in melees. Similarly
affected are Anthing's Netherlands Indies
Brigade (not used at present) and, to a lesser extent, Bijlandt's
brigade. These have also
been given an extra deputy commander (Colonel Rancke and Lieutenant
Colonel De Jongh respectively).
• Cavalry
regiments with a strength of 700 men or more have also been
split. This has less to do with frontage and more with the 700-men
stacking limit for cavalry. Presently only one regiment is affected:
the
1st Hussars KGL.
Other issues:
•
The Netherlands Cavalry Division has been transfered to I Corps; it
only came under Uxbridge's command at Waterloo.
•
Uxbridge's Cavalry Corps has been lifted from the Anglo-Allied Army
Reserve and placed directly under Wellington.
• Von Kruse's Nassau
Brigade has been corrected from division to brigade.
•
In some scenarios the brigades of Van Bijlandt and Von
Saxen-Weimar (Perponcher's division) have swapped artillery batteries
to match the historical
or tactical situation; the game is unfortunately rigid when it comes to
command. Bijleveld's horse battery was attached to Von Saxen-Weimar's
brigade per divisional order of 7 May 1815.
•
The Netherlands horse artillery guns have been corrected from 9-pounder
to 6-pounder type.
•
The
Brunswick foot artillery guns have been corrected from
9-pounder to-6 pounder type.
• The Brunswick
Avantgarde Battalion has been corrected from Guards to Light infantry
type; an "advance guard" is something different than a "guards" unit.
The Brunswick guards unit, but only in name, was the Leib Battalion
(Life Guards). They were more or less green troops and have therefore
not been classed as Guards infantry.
•
To match the historical records the French divisions of Bachelu and
Jérôme Bonaparte have exchanged regiments, giving Bachelu the light
infantry regiment it had at Quatre Bras (2e Légère).
• Likewise Best's Hanoverian
brigade has been transfered to Picton's Division.
• Unit
qualities (QL) have been revised along the lines of the New Settings
Project (see Acknowledgements);
in general the high-end ratings (above A) have been lowered one point.
Some Netherlands units I found to be
overrated, whilst in general I have tried to reflect the varied quality
of their infantry. I was able to look at the following units
in more detail:
•
The
French artillery at Quatre Bras is described as superior by sources
from both sides. Some French batteries have therefore been
upgraded from QL B to QL A.
•
The Netherlands 27th Jäger Battalion was a young unit, reported to be
still behind in training, notably
in skirmishing. Of the total strength of 809 men, 182 men
had combat experience (22%), probably mostly officers and
NCO's.
Its rating has been lowered from QL
B to
QL C.
• Von Kruse's 1st
Nassau Regiment was formed in
April/May 1815 and consisted
for 4/5 of recruits. The time available was used for some
intensive
basic drill,
however. The regular I. and II. Battalion have been rated QL
C and D respectively (was QL B), the Landwehr
Battalion has been rated
QL E (was QL C).
• The
1st
Battalion/Orange-Nassau Regiment was formed in January 1814 around a
core of a few hundred soldiers of the former army of the Grand
Duchy of Berg and was further filled out with new recruits. It
did
not have the Penisular War experience of the 2nd Nassau Regiment and
has been rated QL C (was QL B).
•
The 2nd Battalion/Orange-Nassau Regiment, mobilised in April
1815, was almost entirely filled
with
recruits from the battalion depot and called-up Landwehr. In addition
it structurally lacked ammunition:
the battalion had French muskets, whilst the standard
infantry weapon of the Netherlands Army was the British "Brown Bess"
musket which had a larger calibre. The
battalion was basically kept in reserve both at Quatre Bras
and Waterloo. Its QL rating has therefore been lowered from B
to
D.
Note:
A nice way to simulate this particular ammo problem would be
to
add a new weapon to the "weapons.dat" file: a musket with a maximum
range of just one hex so that they would only fire in self-defence or
another emergency situation. I have not done this as I did not want the
Expansion Pack to overwrite any original game files.
• The Nassau Volunteer Jäger
Company was
not some crack light infantry unit. It was most likely
composed of foresters, woodsmen,
hunters, et
cetera,
armed with a variety of rifles (later described as "rifled
carbines"
by Von Saxen-Weimar).
When the company was raised in 1814 it was however stipulated
that
it should get picked officers. Its rating has
been lowered from QL B to QL C. See also Appendix
B.
•
For the same reason this unit has been reformed into three
skirmisher units. Fielding them as a 175-men formed unit, with a ZOC,
that
can deploy five 29-men skirmisher units, is rather
excessive and negates their ammunition problems.
•
Also to avoid very small skirmisher units the strengths of the 2nd
and 3rd Battalions/95th Rifles (II Corps) have been leveled
out
somewhat.
•
A 25-men cavalry unit, Guides te Paard, has been added to Anglo-Allied
I Corps as
an escort for the Prince of Orange in the Manoeuvre scenarios. The
Mounted Guides were a
60-men reconnaissance and communications unit which during
the Waterloo
Campaign was dispersed over the various headquarters of Anglo-Allied I
Corps. It appears they were mostly used as dispatch
riders and escorts. The unit comprised picked
cavalrymen with at least eight years of active service. It has
however been rated
QL B
rather than QL A, as it is not supposed to be used as a combat unit.
•
The
other "Staff
Officers" and "Escort" units have likewise been given a uniform
strength of 25 men and a QL B rating. These units serve only
to
protect commanders who are in vulnerable positions or might otherwise
feel undressed when entering the map. When their main forces
are
in place the escorts are withdrawn.
•
Unit names are displayed in their own language. Because the available
space in the unit box is deplorably small, historical names are not
possible and abbreviations cannot be avoided. Regarding the Netherlands
Army, the labels "Dutch" and "Belgian" have been deleted since such
designations were not part of unit names. To make the distinction
Belgian units have
their name displayed in French, being their dominant language at the
time: so "2e Linie" is Dutch and "7e Ligne"
is Belgian. Note "karabiniers"/"carabiniers" (Dutch/Belgian).
• Finally it should be
noted that the Quatre Bras order of battle file is a working document and
should not be used for organisational reference;
for example, several units are included more than once to
serve different situations.
For
Waterloo the following additional changes have been made:
• The main force
of the Anglo-Allied Army has been organised in a Left
and Right Wing and a Centre, as per Wellington's historical
arrangements. These are still Corps level organisations
though. For
scenario 4.0 Waterloo:
The Ohain Road Von Alten's division, belonging to the
Centre, has been transferred to the Left Wing so as not to leave them
Detached.
• The strengths
of De Perponcher's artillery have been corrected, from 3
to 7 guns for Bijleveld and from 8 to 3 guns for Stevenart (now
Winssinger, as Stevenart was killed at Quatre Bras).
• The Nassau
Voluntary Jäger have been reduced to 25
men. The large majority of this unit was sent to Brussels on 17 June
because they had spent all their (unusual calibre) ammunition at Quatre
Bras. Their actual strength at Waterloo was 10-12 men, so they shouldn't really be on the map at
all.
• De Collaert's
cavalry has been placed under Uxbridge's command.
• The original
Waterloo oob files take the
Allied losses at Quatre Bras into account only partly; the Brunswick
corps for
example lost ± 800 men. These and other strengths have been corrected.
2.4
Music
Although the Kingdom of the Netherlands provided about 1/3
of Wellington's Anglo-Allied Army, the game's music folder does not
include a
single piece of Dutch or Belgian music. With the addition of Mars voor de gezwinde pas
(Swift Pace March) and Vuren
(Fire) from Marschen en
Signalen voor de Tamboers en Pijpers van de Armee by Jacob
Rauscher (1814) this can now be corrected: download here and
unzip to your
Campaign Waterloo\Music folder. Delivered in the
appropriate
plastic-fantastic sound.
2.5
Graphics (Optional)
Attention:
original files will be overwritten! If you don't have a game cd, back
up your files. Comprising:
• A
modified units.bmp with some new and modified pictures. I made these
from the original file so that the same style is maintained.
There are new unit portraits for Netherlands militia, jäger, horse
artillery and the Orange-Nassau Regiment. Also included are
modified
supply wagon portraits. The latter are not historically
accurate:
to make them more easily recognisable I gave them grey
uniforms, after the uniform of Netherlands artillery train
units. Download here
and unzip to the Campaign Waterloo\Info folder.
• An alternative
modified units.bmp with a unit portrait for the Nassau Volunteer
Jäger (after
Peter Wacker's tentative
description).
Only for the scenarios offered here: if used with the original
scenarios the 2. Regiment Nassau will unfortunately all look like
volunteer jäger. Download here
and unzip to the Campaign Waterloo\Info folder.
• A modified leaders.bmp
with some new portraits for Netherlands commanders. The
original
file is, frankly, a mess and would need to be rebuilt from scratch:
some leaders have the wrong portrait, some share a portrait, some
portraits of known commanders are used for "Colonel Anonymus". As a
consequence some Netherlands unit portaits now end up being used by
British
and
perhaps even Prussian commanders, so you might not want to install
this. If you do, download
here
and unzip to the Campaign Waterloo\Info
folder.
• A cleaned-up and more business-like interface. Only the
horizontal settings ("top" and "bottom") are provided for. Download here
and unzip to the Campaign Waterloo\Info folder.
• A
new cover picture, with sound file. The picture is modified from a
watercolour by Jan Hoynck van Papendrecht (1858-1933), showing
Colonel von Saxen-Weimar conferring with his staff at Quatre Bras in
the early evening of Thursday 15 June 1815 (see below). The sound file
comprises the opening bars of Short Ride in a Fast Machine
by John Adams (*1947). Picture: download here and
unzip to the Campaign Waterloo folder. Sound: download here
and unzip to the Campaign Waterloo\Media folder.
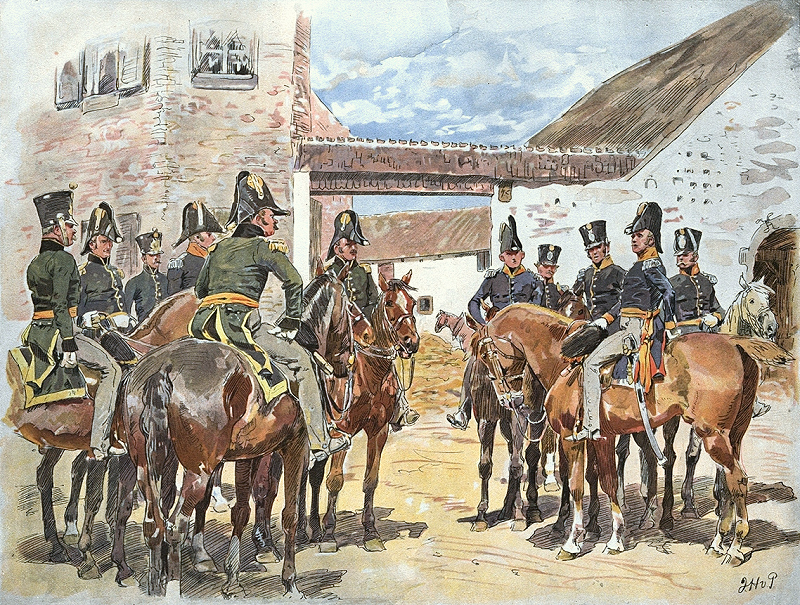
Though
the officer in the foreground on the left resembles Colonel Von
Saxen-Weimar, albeit at an older age, he is meant to be portrayed by
the officer of the Orange-Nassau Regiment on the right. Other drawings
by Hoynck van Papendrecht show that the artist was apparently
unfamiliar with Von Saxen-Weimar's appearance.
• Together with the
terrain mod made by EZJax the game will look like this:
3.
Acknowledgements
Many
of the modified parameter data and order of battle values are inherited
from or inspired by the old New Settings Project, which aimed
to improve the
Talonsoft
Napoleonic Battleground
games. In this project I
collaborated
with Jason
Cawley and Rubén López (2000-2002).
Especially the former provided me with a steep learning curve regarding
game mechanics. Also inherited from this were outdated assumptions
about British fire tactics, which I was made aware of by Geoff McCarty. Pierre
de Wit
was most helpful in answering some questions about the 1815
campaign. Sjak
Draak helped me to increase my understanding of Napoleonic
infantry formations. Bill Peters was helpful with stacking limits. The
image used for the header of
this page shows the outstanding graphics mod made by EZJax.
4.
Sources
My
main source for the scenarios has been Pierre de Wit's excellent
website The campaign of 1815: a study. In
addition I consulted the following publications:
•
M. Adkin: The Waterloo
Companion, The Complete Guide to History’s Most Famous Land Battle
(London 2001)
• F. de Bas: Prins
Frederik der Nederlanden en zijn tijd, Vol. IV (Schiedam
1904)
• F. de Bas and J. de
T’Serclaes de Wommersom: La
Campagne de 1815 aux Pays-Bas, d’après les rapports officiels
Néerlandais (Bruxelles 1908)
• H. Boersma: A Concise History of the Battaillon Jagers
Nº 27 in the Waterloo Campaign, 1815, Part I (NWC Newsletter
16, 2001)*
• F. Brandes: Mit den Geschützen des schwarzen Herzogs
nach Brabant! (Braunschweiger Artillerie vom Jahre 1809-1815, Teil 2)
(Brunswiek Historica)
• J.
Franklin: Waterloo,
Netherlands
Correspondence, Volume One, Letters and Reports from Manuscript Sources
(Ulverston 2010)
• P. Hofschroër: 1815, The Waterloo Campaign,
Wellington, His German Allies and the Battles of Ligny and Quatre Bras
(London 1998)
• R. MacArthur, Squares
and Oblongs (Blog)
•
G.
Nafziger: Imperial
Bayonets, Tactics of
the Napoleonic Battery, Battalion and Brigade as Found in Contemporary
Regulations (London 1996)
• B. Nosworthy: Battle Tactics of Napoleon and
His Enemies (London 1997)
• M. Robinson: The Battle of Quatre Bras 1815
(Stroud 2009)
• P. Wacker: Das herzoglich-nassauische
Militär 1806-1866 (Taunusstein 1998)
• G. van Uythoven: Foot Artillery Officers of the Netherlands
Serving from 1813 to 1815 (The Napoleon Series)
• G. van Uythoven: Horse Artillery Officers of the Netherlands
Serving from 1813 to 1815 (The Napoleon Series)
• G. van Uythoven: Netherlands Artillery Equipment and Train
during the Waterloo Campaign (Home Page)
* Recent research
has established that the battalion flag shown in this article
was
not orange but green, and that it was not used in the 1815 campaign.
5. Appendices
A.
Map of the Battlefield of Quatre Bras,
October 1815
Scale
1:10,000. Elevation lines per 1 to 5 meters. Copied
from De vorming
van het Nederlandsche leger na de omwenteling van 1813 en het aandeel
van dat leger aan den veldtocht van 1815
(Breda: Koninklijke Militaire Academie, 1900) by W.E.A.
Wüpperman.
Based on the "Map of the battlefields of Waterloo and Quatre Bras.
Recorded by order of Major-General Van der Wijck, commander of the
Field Engineer Brigade, on 1 October 1815, No. 17, under the direction
of Captain Engineer Schuller, by the 1st Lieutenant Engineers Brade and
Backer Seest."
It
is hard to understand why this map, based on a map made by military
engineers only four months after the battle, has not been used as the
single source for this area of the game map. See also this 2001 article.
It is especially significant for the Bossu Wood, which was cut down in
1839. Most maps of later date, for instance the one
in
Siborne the Younger's Waterloo
Letters
(1891), appear to show the wood with the southern part already cut
down. One can compare the Schuller map with the game map for
one's
self, but here are the main issues as I see them:
• The shape and size of the
Bossu Wood (see also this article)
• The Grand Pierrepont farm
is located too far to the south (this can be verified on Google Earth; it should be
only slightly more south than the Lairalle farm). This also
applies to the Petit Pierrepont farm
• The Pierrepont (Odomont)
stream extends too far beyond Grand Pierrepont
• The
Grand Pierrepont farm might need a chateau hex rather than a village
hex. For the Lairalle farm and Pireaumont in particular chateau
hexes are less than obvious. There should definitively not be
a wall around Pireaumont
• To the east and
south-east of Grand Pierrepont there are two roads missing
• The northern part of the
De la Hutte Wood is much too close to the Lairalle farm
• There
were no buildings in the south-eastern corner of the crossroads, and
there
is no justification for the chateau hex in the north-eastern
corner
• Though
a straight line may well become bendy in hex-translation, the
Brussels-Charleroi road should clearly be as straight as possible. The
bend in the road north of Gemioncourt for example (see the screenshot
above) makes this area easier to defend than it should be
Not as useful as reference because of its earlier date, but
very beautiful, is the 1777 Ferraris map, the Quatre Bras section of
which can be seen here. For the entire map, go here
or here.
B. Account
of the Battles of Quatre Bras and Waterloo, by Lieutenant Colonel W.A.
de Jongh, Commander of the National Militia Battalion No. 8

The 5th
National Militia at Gemioncourt. Painting by Piet de Jong, probably
early 20th century
C.
The Uniform
of the Nassau Volunteer Jäger Company
About the uniform of
the Freywillige
Oranische Jägerkompanie there is hardly any
information available. This great
website supposes they wore the uniform of the 2. Regiment
Nassau but of better quality, assumptions probably based on Coppens/Courcelle.
I have however never seen any evidence for this. That these
volunteers, probably hunters, foresters, woodsmen etc., would be rich
enough to buy fancy uniforms also seems less obvious. In 2000 I
wrote to Peter Wacker, author of Das herzoglich-nassauische
Militär 1806-1866, asking if he had any
information. He was kind enough to reply and wrote:
"Here the sources are
still contradictory. Probably: green coat; collar, wings [shoulder
rolls, HB], piping and
cuffs (pointed in Polish fashion) bright yellow; yellow buttons; grey
trousers. Yellow leather work; shako after Dutch model; Carabineers [?
HB] fur busby with yellow pouch. Officers as
Dutch Jäger? Shako with laced top band, rank-distinctives
and wings in yellow
metal, yellow gorget with coat of arms, orange [waist] sash. But: there
are many questions open here!"
My translation may be imperfect. The uniform described is much like
that of the Dutch jagers, except for the Nassau leather work. During
the campaign the company was attached to the Orange-Nassau Regiment,
which regiment had been incorporated in the Netherlands Army
and had received the number 28 of the line. For this reason it wore
Dutch-styled uniforms, contrary to the 2nd Nassau Regiment which was
only hired by the Netherlands. It may thus be that the volunteer jäger
were also incorporated rather than hired, or that the
Netherlands Army arranged for their clothing for practical reasons. More research is
needed here.
D.
Unit
Icons for Battleground
Prelude to Waterloo and Battleground Waterloo
Many a nightly hour was spent on these, many
years ago. I think they can still hold their own and people playing the
old Battleground
games, now supported by Matrix Games,
might have a use for them. They come with an order of battle
file,
leader portraits, a Quatre Bras scenario and some other files. It
should all still work.
This website ©
Hans Boersma 2018-2020
|


